
Installing a wall oven is a rewarding project that can enhance your kitchen’s functionality and aesthetics. While it may seem daunting, following a structured approach ensures a safe and successful installation. This guide covers every aspect of the process, from preparation to securing the oven, making electrical connections, and using trim kits for a polished finish. We’ll also discuss the benefits of hiring professionals like InstaFit Appliances.
Understanding Wall Ovens
Wall ovens are built-in units designed to fit seamlessly into your kitchen cabinetry, offering more countertop space and a sleek look. Here’s what you need to know:
- Types of Wall Ovens:
- Single Ovens: Ideal for small kitchens or households with limited baking needs.
- Double Ovens: Perfect for larger families or those who cook multiple dishes simultaneously.
- Combination Units: Combine a conventional oven with a microwave or a convection oven for versatility.
- Sizes and Configurations:
Standard widths are 24, 27, and 30 inches, but custom options are available for specific needs. Always check the manufacturer’s specifications to ensure the oven fits your kitchen layout.
Preparation Before Installation
Thorough preparation is key to avoiding complications during installation. Follow these steps:
- Measure the Wall Cavity:
Use a measuring tape to check the height, width, and depth of the space where the oven will be installed. Compare these measurements with the oven’s dimensions and ensure enough clearance for ventilation. - Check the Electrical Supply:
Wall ovens typically require a dedicated 240-volt circuit. Verify that your kitchen wiring meets this requirement. If not, consult a licensed electrician to upgrade your electrical setup. - Read the Manufacturer’s Manual:
The installation manual provides specific guidance for your oven model, including wiring diagrams, mounting instructions, and required clearances. - Prepare the Installation Space:
Remove any debris or obstacles from the wall cavity and ensure it is clean, level, and stable.
Tools Required for Installation
Gathering the right tools ensures a smooth installation process. Here’s a detailed list:
- Measuring Tape: For accurate cavity and oven measurements.
- Screwdrivers: Both flathead and Phillips-head types for securing screws.
- Power Drill: Required to drill holes in cabinetry or wall surfaces.
- Spirit Level: Ensures the oven is installed evenly, preventing performance issues.
- Wire Strippers: Essential for connecting electrical wires.
- Gloves and Safety Goggles: Protect against sharp edges, electrical shocks, and debris.
- Voltage Tester: Confirms that the power supply is turned off before working with wiring.
Safety Precautions
Safety should always be a top priority during any electrical or heavy appliance installation. Here are key precautions:
- Turn Off Power:
Locate the circuit breaker for the oven’s electrical supply and switch it off. Use a voltage tester to confirm there is no power in the wires. - Use Protective Gear:
Wear gloves to handle sharp edges on the oven or trim kit and goggles to protect your eyes from dust and debris. - Avoid Overloading Circuits:
Wall ovens draw significant power. Ensure your kitchen wiring can handle the load without risking overheating or fire. - Follow Local Codes:
Check local building and electrical codes to ensure compliance. This might include specific requirements for ventilation or grounding.
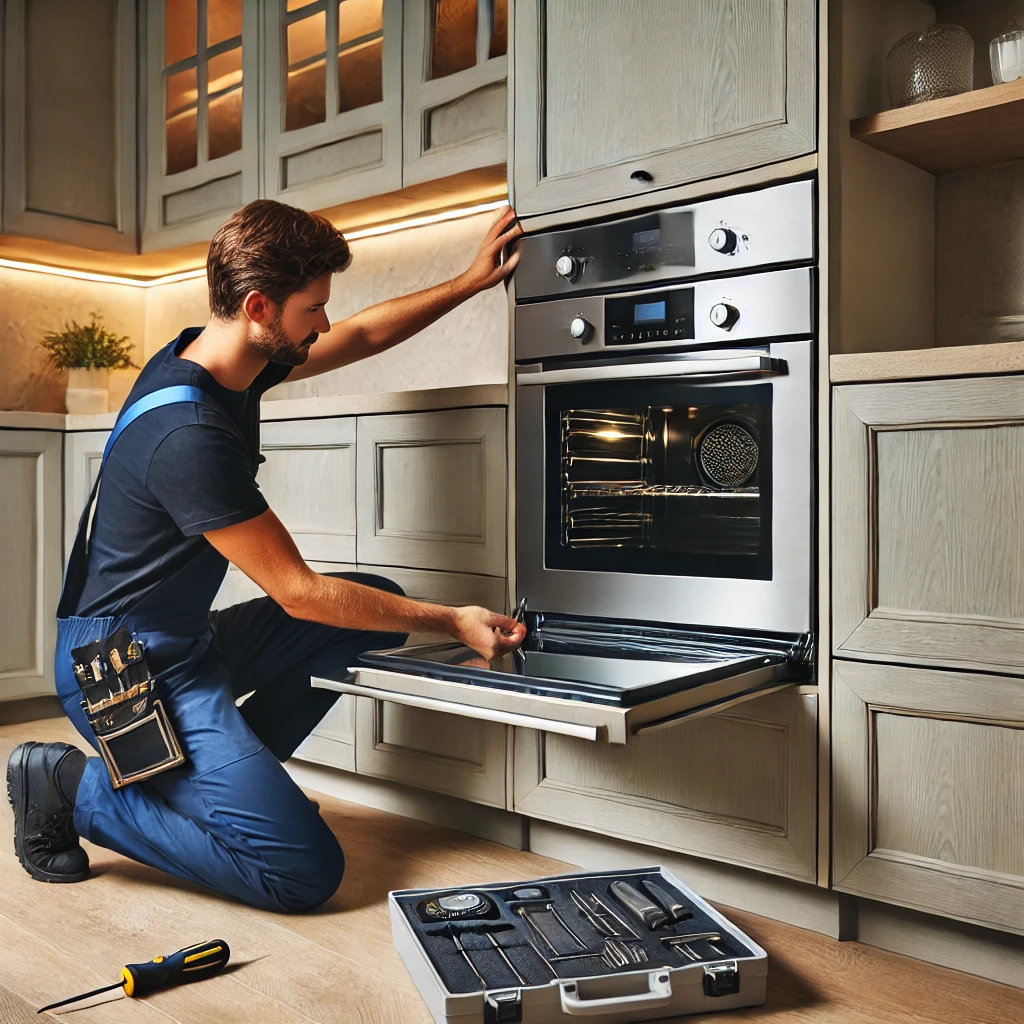
Steps for Wall Oven Installation
Installing a wall oven requires careful execution. Follow these detailed steps:
- Prepare the Cavity:
Clean the area where the oven will sit. If the cavity is uneven, use shims to create a level surface. - Position the Oven:
With assistance, carefully lift the oven into the cavity. These units can be heavy, so use a dolly or enlist help to avoid injury. - Secure the Oven:
Align the oven’s mounting holes with the pre-drilled holes in the cabinetry. Use the screws provided to anchor the oven securely. This step prevents the unit from shifting or tipping during use. - Connect Electrical Wiring:
Match the oven’s wires to the home electrical supply: black to black (hot), white to white (neutral), and green to the grounding wire. Secure connections with wire nuts and tape. - Install Trim Kit:
Attach the trim kit around the oven’s edges to fill gaps and enhance the aesthetic appeal. Most kits include brackets and screws for a snug fit.
Securing the Wall Oven
Ensuring the oven is stable within its cavity is crucial for safety and performance. Here’s how to do it:
- Use the manufacturer’s mounting brackets or straps to anchor the oven.
- Double-check that all screws are tightened securely.
- Verify that the oven does not wobble or tilt when the door is opened.
Making Electrical Connections
Electrical wiring is one of the most critical aspects of wall oven installation. Follow these guidelines:
- Turn Off the Circuit: Always confirm the power is off before touching wires.
- Follow the Wiring Diagram: Use the manual’s wiring diagram for accurate connections.
- Use Quality Materials: Invest in high-quality wire nuts and connectors to ensure a safe, long-lasting installation.
- Hire an Electrician: If you’re unfamiliar with electrical work, a professional can ensure compliance with safety codes.
Installing Trim Kits
Trim kits are designed to cover gaps and create a seamless look. Here’s how to install them:
- Align the Brackets: Attach side brackets to the oven’s edges using the screws provided.
- Fit the Trim Frame: Slide the trim frame into place, ensuring a snug fit.
- Secure with Screws: Tighten all screws to prevent the trim from loosening over time.
Testing and Adjustments
After installation, test the oven to ensure it operates correctly:
- Restore Power: Turn the circuit breaker back on.
- Test Functions: Check the oven’s basic functions, including heating, timer, and lights.
- Inspect Stability: Open and close the door to ensure the oven remains secure.
- Fine-Tune Alignment: Adjust the trim kit or oven position if needed for a perfect finish.
Common Challenges
Installing a wall oven isn’t without challenges. Here are some common issues and solutions:
- Misaligned Cavity:
If the cavity is uneven, use shims or consult a carpenter to make adjustments. - Electrical Problems:
Faulty wiring or an inadequate circuit can cause delays. Always check these before installation. - Trim Kit Issues:
Gaps or misaligned trim kits can ruin the aesthetic. Double-check measurements and follow instructions carefully.
Benefits of Hiring Professionals
While DIY installation is possible, hiring professionals like InstaFit Appliances has its advantages:
- Expertise: Professionals are experienced in handling heavy appliances and electrical wiring.
- Safety: Avoid risks associated with electrical work and heavy lifting.
- Time-Saving: Professionals complete the job quickly and efficiently.
- Warranty Protection: Some warranties require professional installation.
Maintenance Tips Post-Installation
To keep your oven in top condition:
- Clean Regularly: Use a soft cloth and non-abrasive cleaner to wipe surfaces.
- Inspect Wiring: Check electrical connections annually to ensure safety.
- Avoid Overloading: Refrain from placing excessively heavy items on the oven racks.
Call InstaFit Appliances for Assistance
For a stress-free installation, contact InstaFit Appliances. Their skilled technicians provide top-notch service, ensuring your wall oven is installed safely and efficiently. Call them today to schedule an appointment.
FAQs
- What is the average cost of professional wall oven installation?
Costs vary but typically range from $200 to $500, depending on complexity. - How do I know if my wall cavity is the right size?
Measure the height, width, and depth and compare them to the oven’s specifications. - Can I install a wall oven in an existing cabinet?
Yes, but you may need to modify the cabinet for proper fit and ventilation. - What happens if I don’t use a dedicated circuit?
Overloading the circuit can lead to tripped breakers or fire hazards. - Do I need a trim kit for my oven?
Trim kits are optional but recommended for a finished look. - Why choose InstaFit Appliances?
They provide reliable, professional installation services with a focus on customer satisfaction.
Conclusion
Installing a wall oven can transform your kitchen, but it requires careful planning and execution. From preparation and safety to electrical connections and trim kits, every detail matters. For a worry-free experience, consider hiring InstaFit Appliances to handle the job professionally. Enjoy the convenience and style of your new wall oven with peace of mind.